Maple
Documentation & Usage
- Created by: ThemeRuby
- Demo URL: http://demo.themeruby.com/maple
01. Getting Started
Theme Requirements
In order to proceed with the theme installation, you need to make sure you have the latest version of WordPress (3.5+) on your self-hosted site.
Theme Installation
- Log into your WP Admin and browse for Appearance → Themes.
- Now navigate to the secondary tab: Install Themes and click the Upload link option.
- Follow the instructions by choosing the file "maple.zip", located in the archive which you have downloaded from ThemeForest and click "Install Now" button.
- Click Activate link, once the upload has finished, and you are ready for the next steps.
I strongly recommended to run Demo Import only on a fresh WordPress site. Try import theme options and widgets if you site already data.
Some copyrighted images won't be imported.
One Click To Import Demo (optional)
With the Maple theme, you have the option to either start building your site from scratch, or choosing to import one of our demo sites to use as a starting point, and modifying it to suit your needs.
Maple comes with a one-click import feature. To import one of demo sites, please follow these steps:
- Log into your admin panel
- Navigate to Theme Options -> Demo Importer
- Select demo, Then click on Import
Please be patient and do not navigate away from this page while the import is in process. This may take up to several minutes ( according to your server speed). This page will refresh when the import is completed.
If the process is still not running after 10 min, You can refresh page and click import again.
You must to install Maple Ruby Import Demo plugin and active it before doing this action.
Import Demo Via XML file (optional)
1. Imported data
The theme comes with a .xml file containing demo content you can import into your WordPress site. This will help you get started, in case you are running on a fresh WP installation with no content at all. To upload the demo content follow this steps:
- Navigate to Tools → Import.
- Click on "WordPress" link (if the Importer plugin is not installed, install it now).
- Select the demo.xml file located in the archive which you have downloaded from ThemeForest and click "Upload file and import" button.
- Go to Appearance -> Menus -> Menu locations -> Assigned Menu for menu and then click "Save".
- Your are done! Now your site is populated with demo content.
1. Imported Theme options
- Select the theme-option.json file located in the archive which you have downloaded from ThemeForest. Open this file with TXT editor, select all text and then copy it.
- Navigation to Theme options → Imported/Exported. Click Imported from file. and then paste text you have just copied. And then, click import..
3. Imported Widget
plugins we recommend:
- Envato Wordpress Toolkit - this plugin will let you know when our theme is updated. Install the plugin and enter your Envato Marketplace username & and your API key.
Contact Form 7 - Contact Form 7 can manage multiple contact forms, plus you can customize the form and the mail contents flexibly with simple markup
MailChimp for WordPress - MailChimp for WordPress, the absolute best. Add subscribers to your MailChimp lists from your WordPress site, with ease.
Force Regenerate Thumbnails - Usefull if your site already have a lot of content and images. Allows you to delete all old images size and regenerate the thumbnails for your image attachments.
Widget Importer & Exporter - MailChimp for WordPress, the absolute best. Add subscribers to your MailChimp lists from your WordPress site, with ease.
03. Creating Categories
To start creating categories navigate to Posts → Categories. First do all the usuall stuff: type the category name and slug
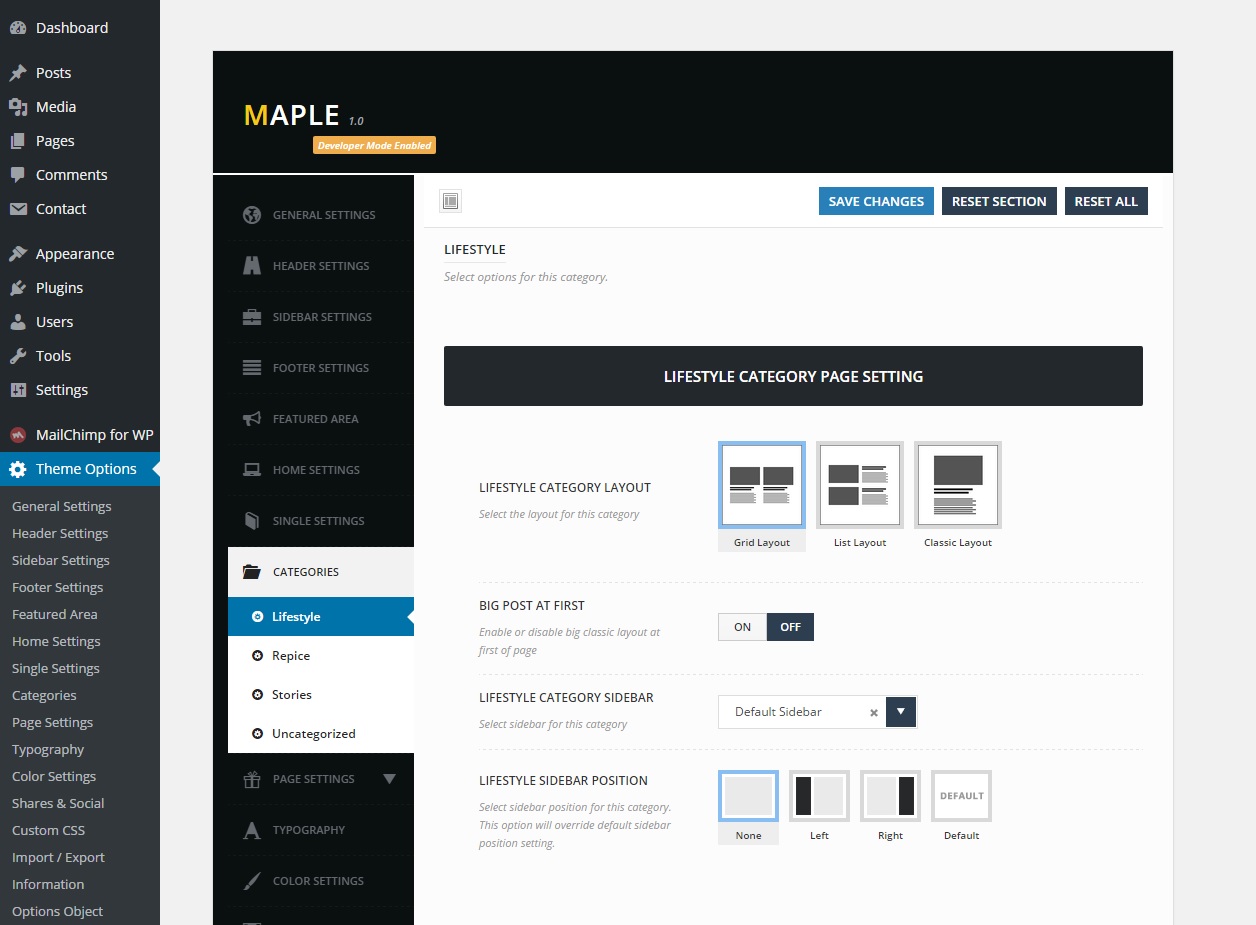
To get started navigate to Theme Options → Categories
- 1. Category Layout - Select the layout for this category.
- 2. Big Post First - Display classic layout at first post.
- 3. Category Sidebar - Select custom sidebar for category.
- 5. Sidebar Position - Select sidebar position for this category. This option will override default sidebar position setting.
04. Adding New Post
To create a new post navigate to Posts → Add New.
Post Formats
Maple support four WordPress native post formats. Each format has it's own custom fields (except Standard) for simple content making.
- Standard - uses only the default fields.
- Video - when you select this format a custom "Video Post" field will apper below the editor. Paste here the URL of the page with the video you want to add. Most of the video hosting sites are supported such as Vimeo and YouTube.
- Gallery - when you select this format a custom "Gallery Post" box will apper below the editor. Adding the gallery:
- Click the "Add Image". The images manager will appear.
- Upload images you want to be in the galley
- Hold down the Ctrl key and select the images with your mouse. Click the "Select" button at the bottom. Now your images are added to the gallery
You can drag & drop the images to rearrange the order.To remove the image from the gallery, place the mouse over the image and now you see the remove icon on the top right corner of the image. If you want to add another image click on "Add Image" button again. - Audio - when you select this format a custom "Audio Post" field will apper below the editor. Paste here the URL of the page with the audio track you want to add from Sound Cloud.
Post Options
By using options in this box you can deside what happens in single post and add this post to different locations of your site.
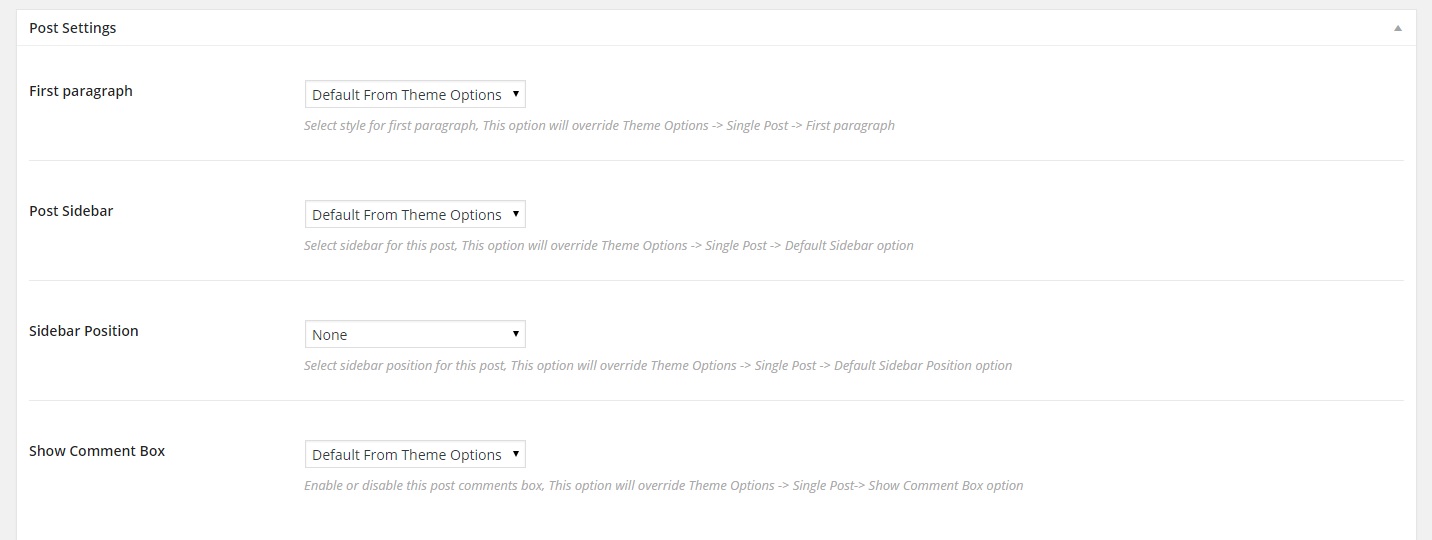
- 1. First Paragraph - You can select drop cap or or style for each post.
- 2. Post sidebar - You can assign sidebar for each post. This option will override default post sidebar in single options.
- 3. Sidebar Position - You can select sidebar position for each post.
- 4. Show Comment Box - You can disable comment for each post .This option will override default post sidebar in single options.
05. Creating About Page
Maple support about page template. To create about page, following below step
To start creating the pages navigate to Pages → Add New. Leave the "About me template" in "Template" dropdown.
Select featured image for about page
08. Site Authors
Author Avatar
To make your author avatar to appear on your site, register at gravatar.com with the same email you registered at your site.
Social Profiles
We added some extra fields to the user profile page to extend the information about the authors of your site. The added fields are: Social Profiles and a Custom Avatar upload instead of the default WP gravatar.
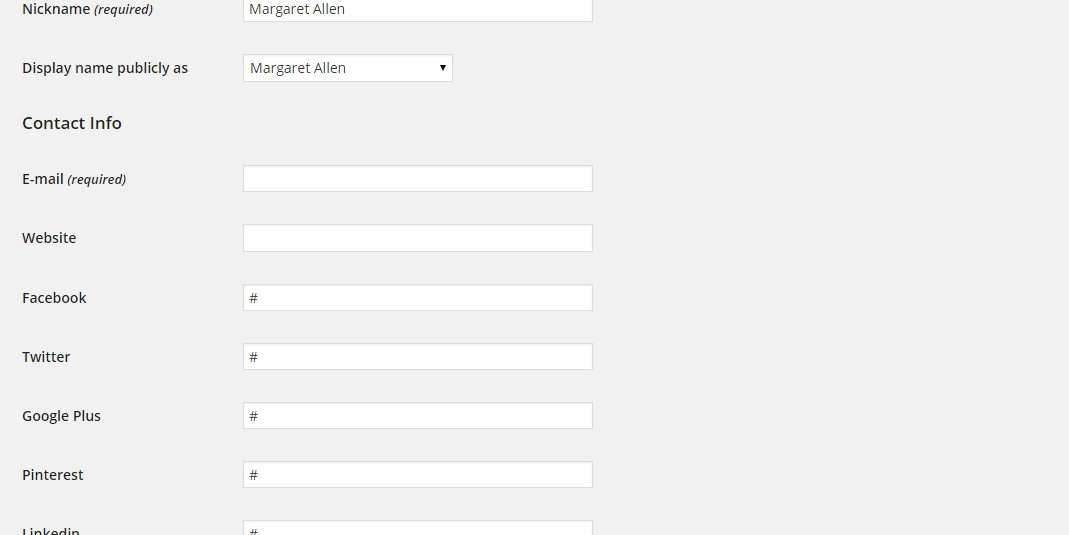
To add a new author and information that will be visible on the front, follow this steps:
- Navigate to: Users → Add New
- Name: Select "Author" in "Role" dropdown and select desired name in "Display name publicly as" dropdown
- Contact Info: Type the website address
- About the user: Fill in the Biographical Info
- Social Profiles: Fill all the desired fields with the socical profile username.
09. Theme Options
The Theme Options Panel helps you easily take control over your site, by allowing you to upload your logo and favicon, style the appearance of the theme with your custom colors, change fonts, turn features on and off, paste custom CSS and JS code, paste the Analytcs code without having to write any code.
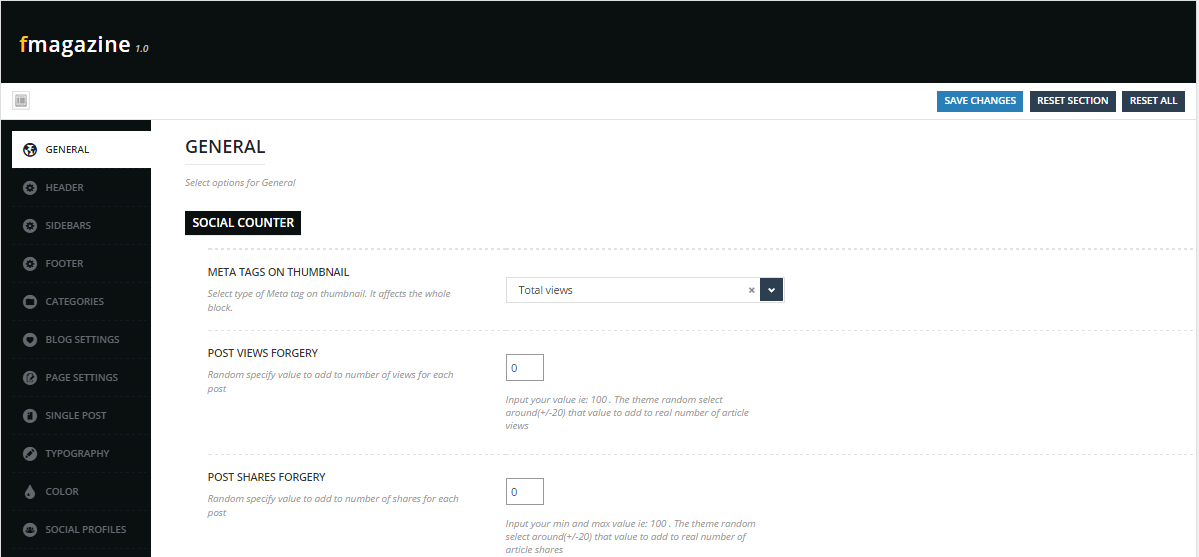
To access the Theme Options panel, navigate to Dashboard → Theme Options.
10. Customization
There are two ways to customize the theme without changing it's core files.
1. Theme Options Panel Custom CSS box
To style the theme with custom CSS, navigate to Appearence → Theme Options and click on the "Css code" tab. The first text box "Custom CSS" is where you can wright your own CSS code.
2. Use child theme
install child theme, then active it. now, you can write your css into style.css of child theme
2. Use custom.css
if you don't want child theme you can add your style into custom file of theme
- find custom folder in theme folder
- custom folder include 2 file: custom.css and custom.js, you can write your style here
11. Translation
Translate via 3rd party plugin
To translate your entire website, Please follow below steps:
- Tell WordPress what language to use. Visit "Options > General" and select your language
- Download the plugin: https://wordpress.org/plugins/loco-translate/
- Follow the instruction steps of the plugin, create a .PO file and translate what text you wish.
Translate via PO.file
To translate your entire website, Please follow below steps:
- Tell WordPress what language to use. Visit "Options > General" and select your language
- Download and install POEDIT: https://poedit.net/
- Connect to your site folder via FTP or Cpanel -> open your theme/languages directory
- Look for the maple.pot file in the theme package, downloads and open it with POEDIT.
- Translate what the test you want and save it ie: pt_PT( pt_PT is an Internationalize code name, pt_PT is Portugues), You need to save the file name to fit with your language. You can find here: https://wpcentral.io/internationalization/ Two files will be generated after saving.
- Upload files after translating into wp-content/themes/maple/languages folder
11. Update theme
This theme may be updated periodically in order to add new features and fix bugs. When a new update be available an update message will appears on your WordPress dashboard . As a customer, you can download the most current version from your ThemeForest account..
Updating Automatically Via Envato Market
Envato has developed the Envato Market Plugin for WordPress. You can use this to receive notification of updates to themes purchased from ThemeForest and to automatically update (upon clicking) directly from within your WordPress admin area.
- After installation, click on active this plugin.
- Click the new Envato Market link in the menu and follow the instructions to configure the plugin.
Updating Theme Via FTP
- Download the most current version from Themeforest
- Unzip the package and locate maple.zip in the theme folder
- Unzip maple.zip
- Connect to your site via FTP
- Upload the theme folder you unzipped to wp-content/themes
- You should be asked to confirm overwriting of this folder and its contents. Confirm the overwrite.
Updating Manually Via Admin Panel
- Download the most current version from ThemeForest in the "Downloads" area of your account.
- Unzip the package and locate maple.zip in the theme folder.
- find and unzip maple.zip
- Connect to your site via FTP
- Upload the theme folder you unzipped to wp-content/themes
- You should be asked to confirm overwriting of this folder and its contents. Confirm the overwrite.